To get started, sign up for a free Teacher account using your @alaska.edu email address. This will allow you to upload and annotate images on Thinglink. You will not need the more advanced features of Thinglink for this course.
Please sign up for an account at https://www.thinglink.com/edu

Click on “Get started’
Fill out the information to sign up (if you have already created an account you will need to delete it and start over to get the right sharing privileges).
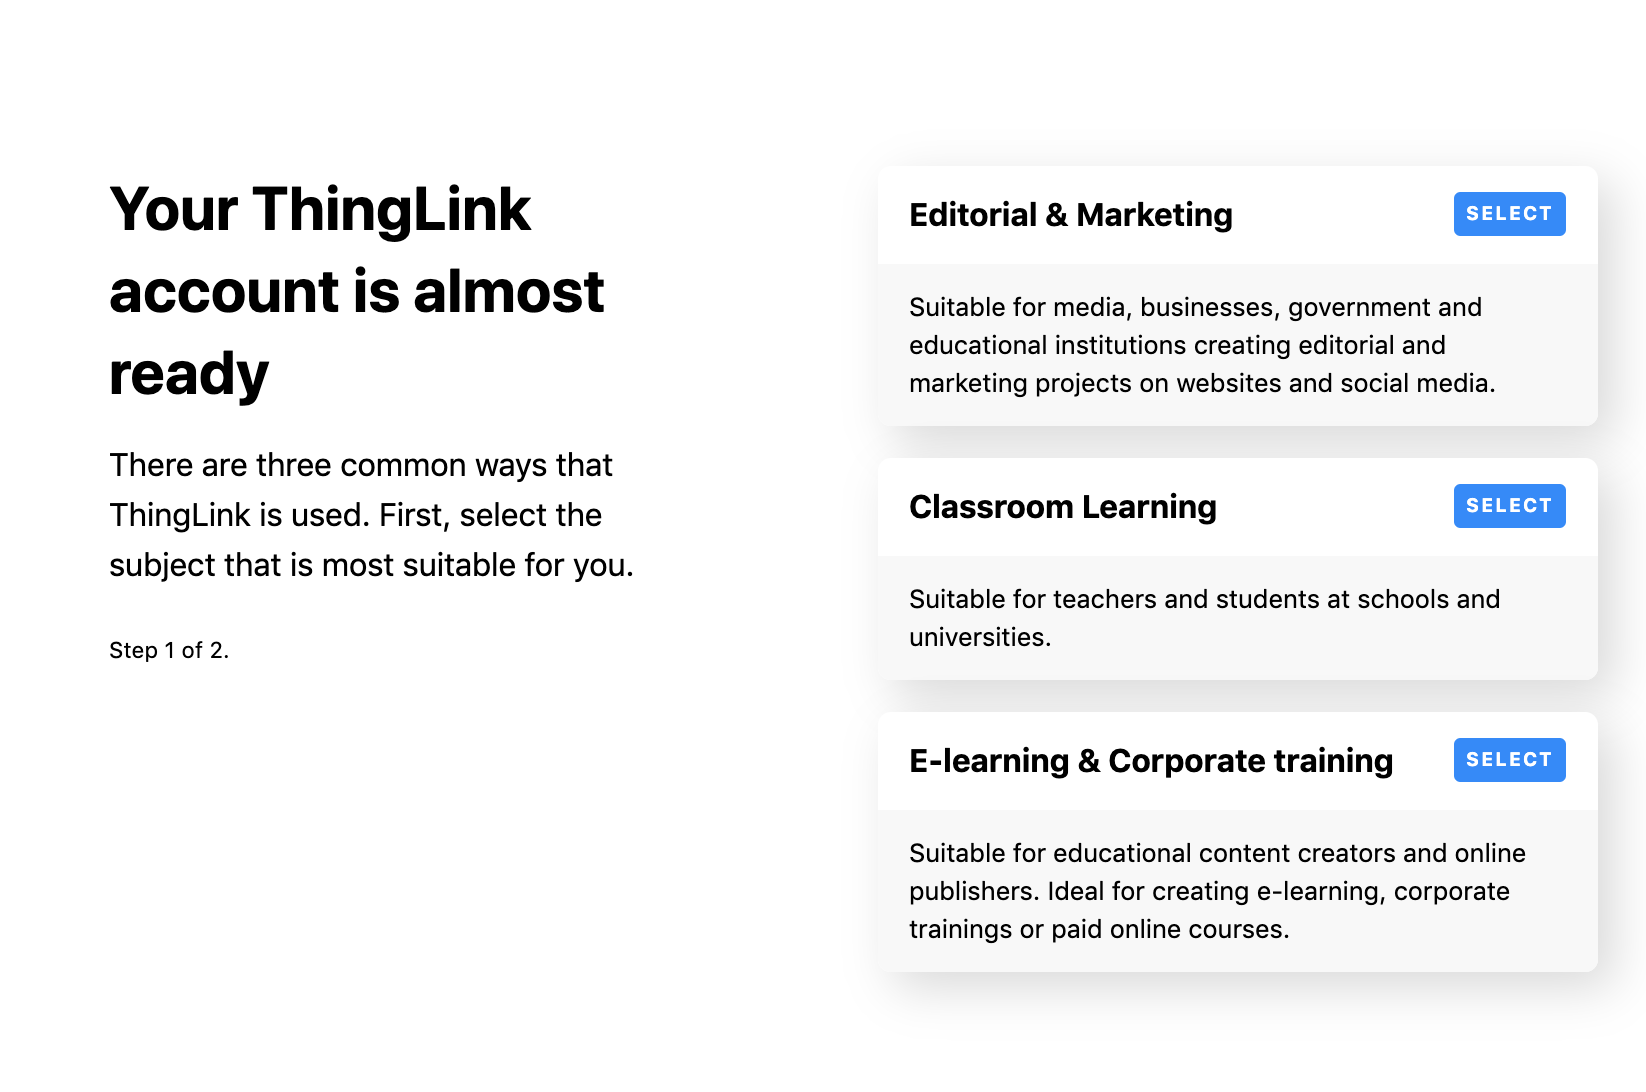
The next step is crucial! Here you will want to select “CLASSROOM LEARNING’
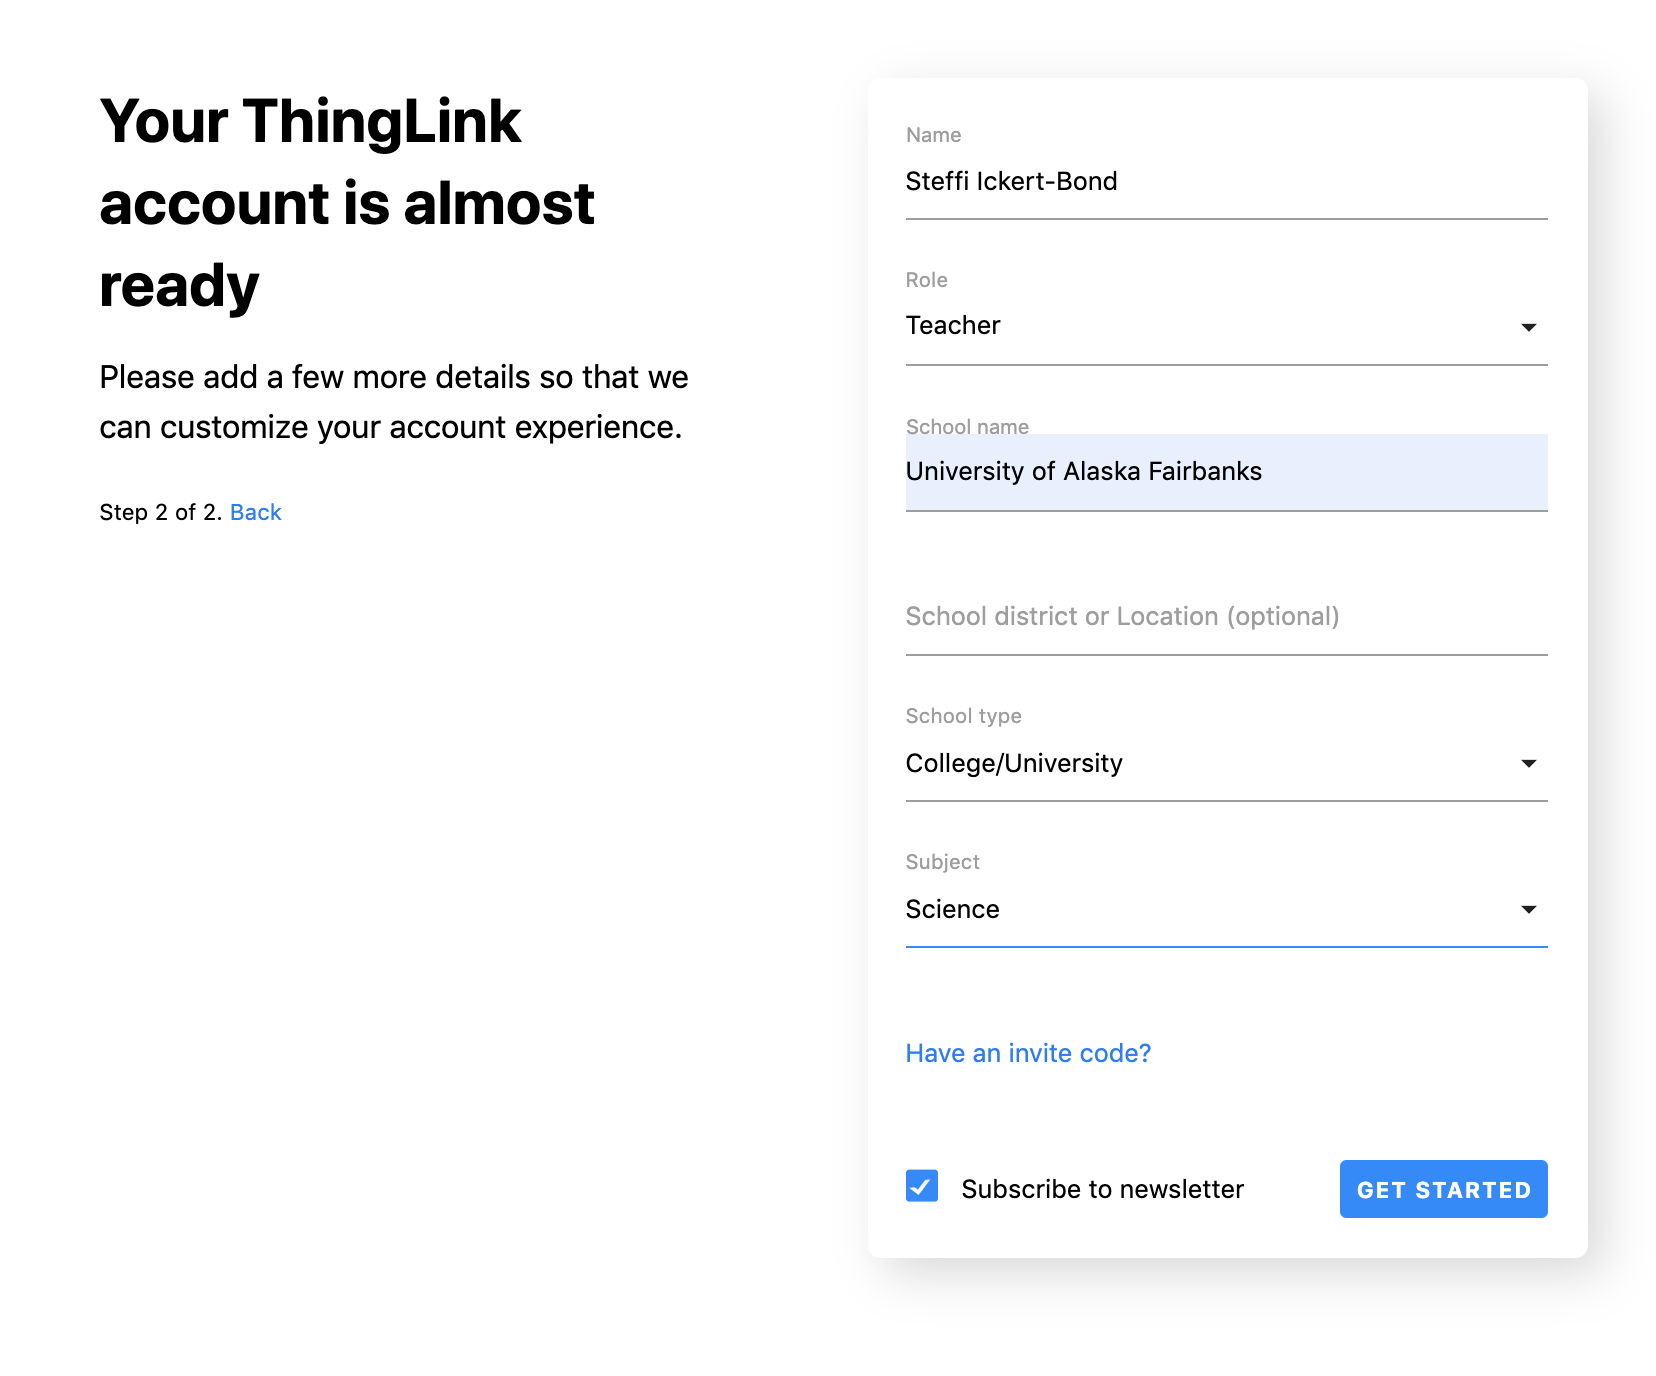
And in the next step select “TEACHER’ . This will allow you to share with others for free. I am showing you what I entered, please update with your information. Now you are ready to “play’.
Instructions for Uploading Images
There are two ways to load images into the Thinglink editor. You can load them from your computer, or load them from a URL. You can find instructions for doing both on the Thinglink site.
Upload your image. Use the CREATE button on the right and “UPLOAD IMAGE’.
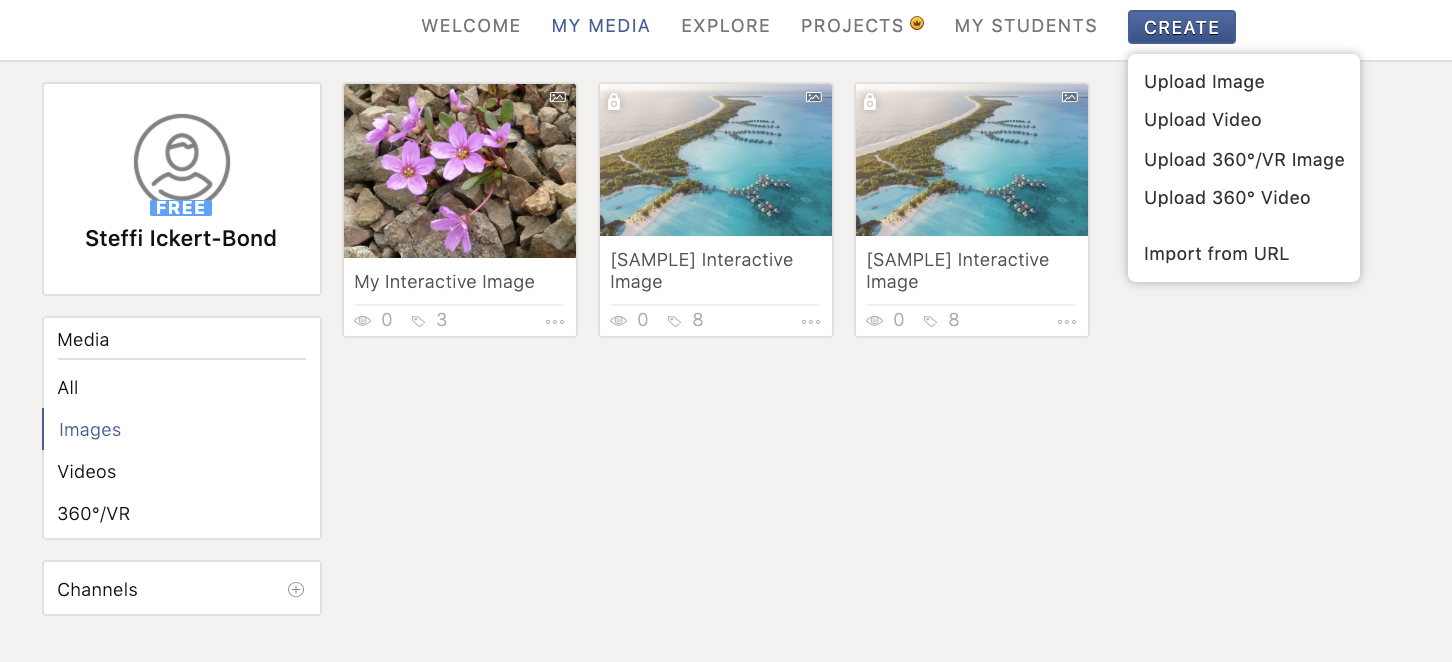
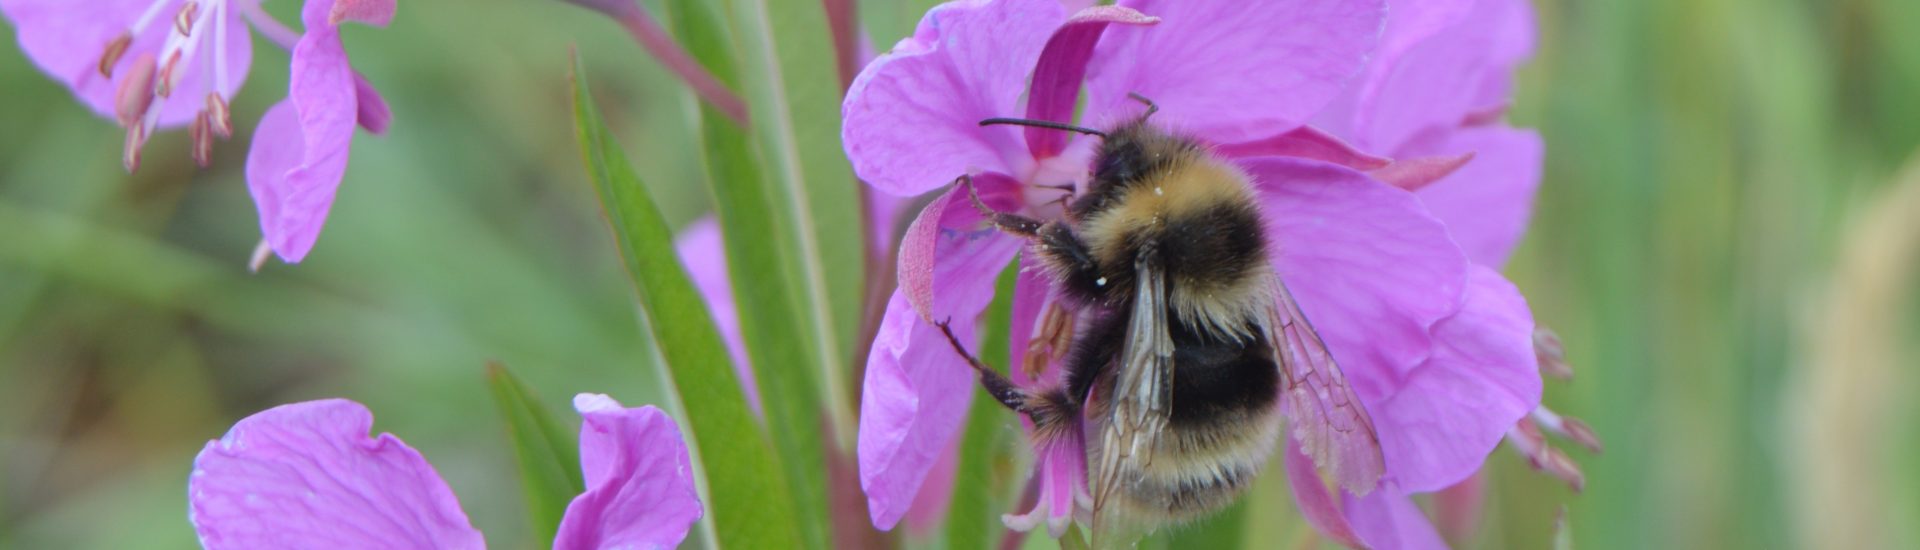
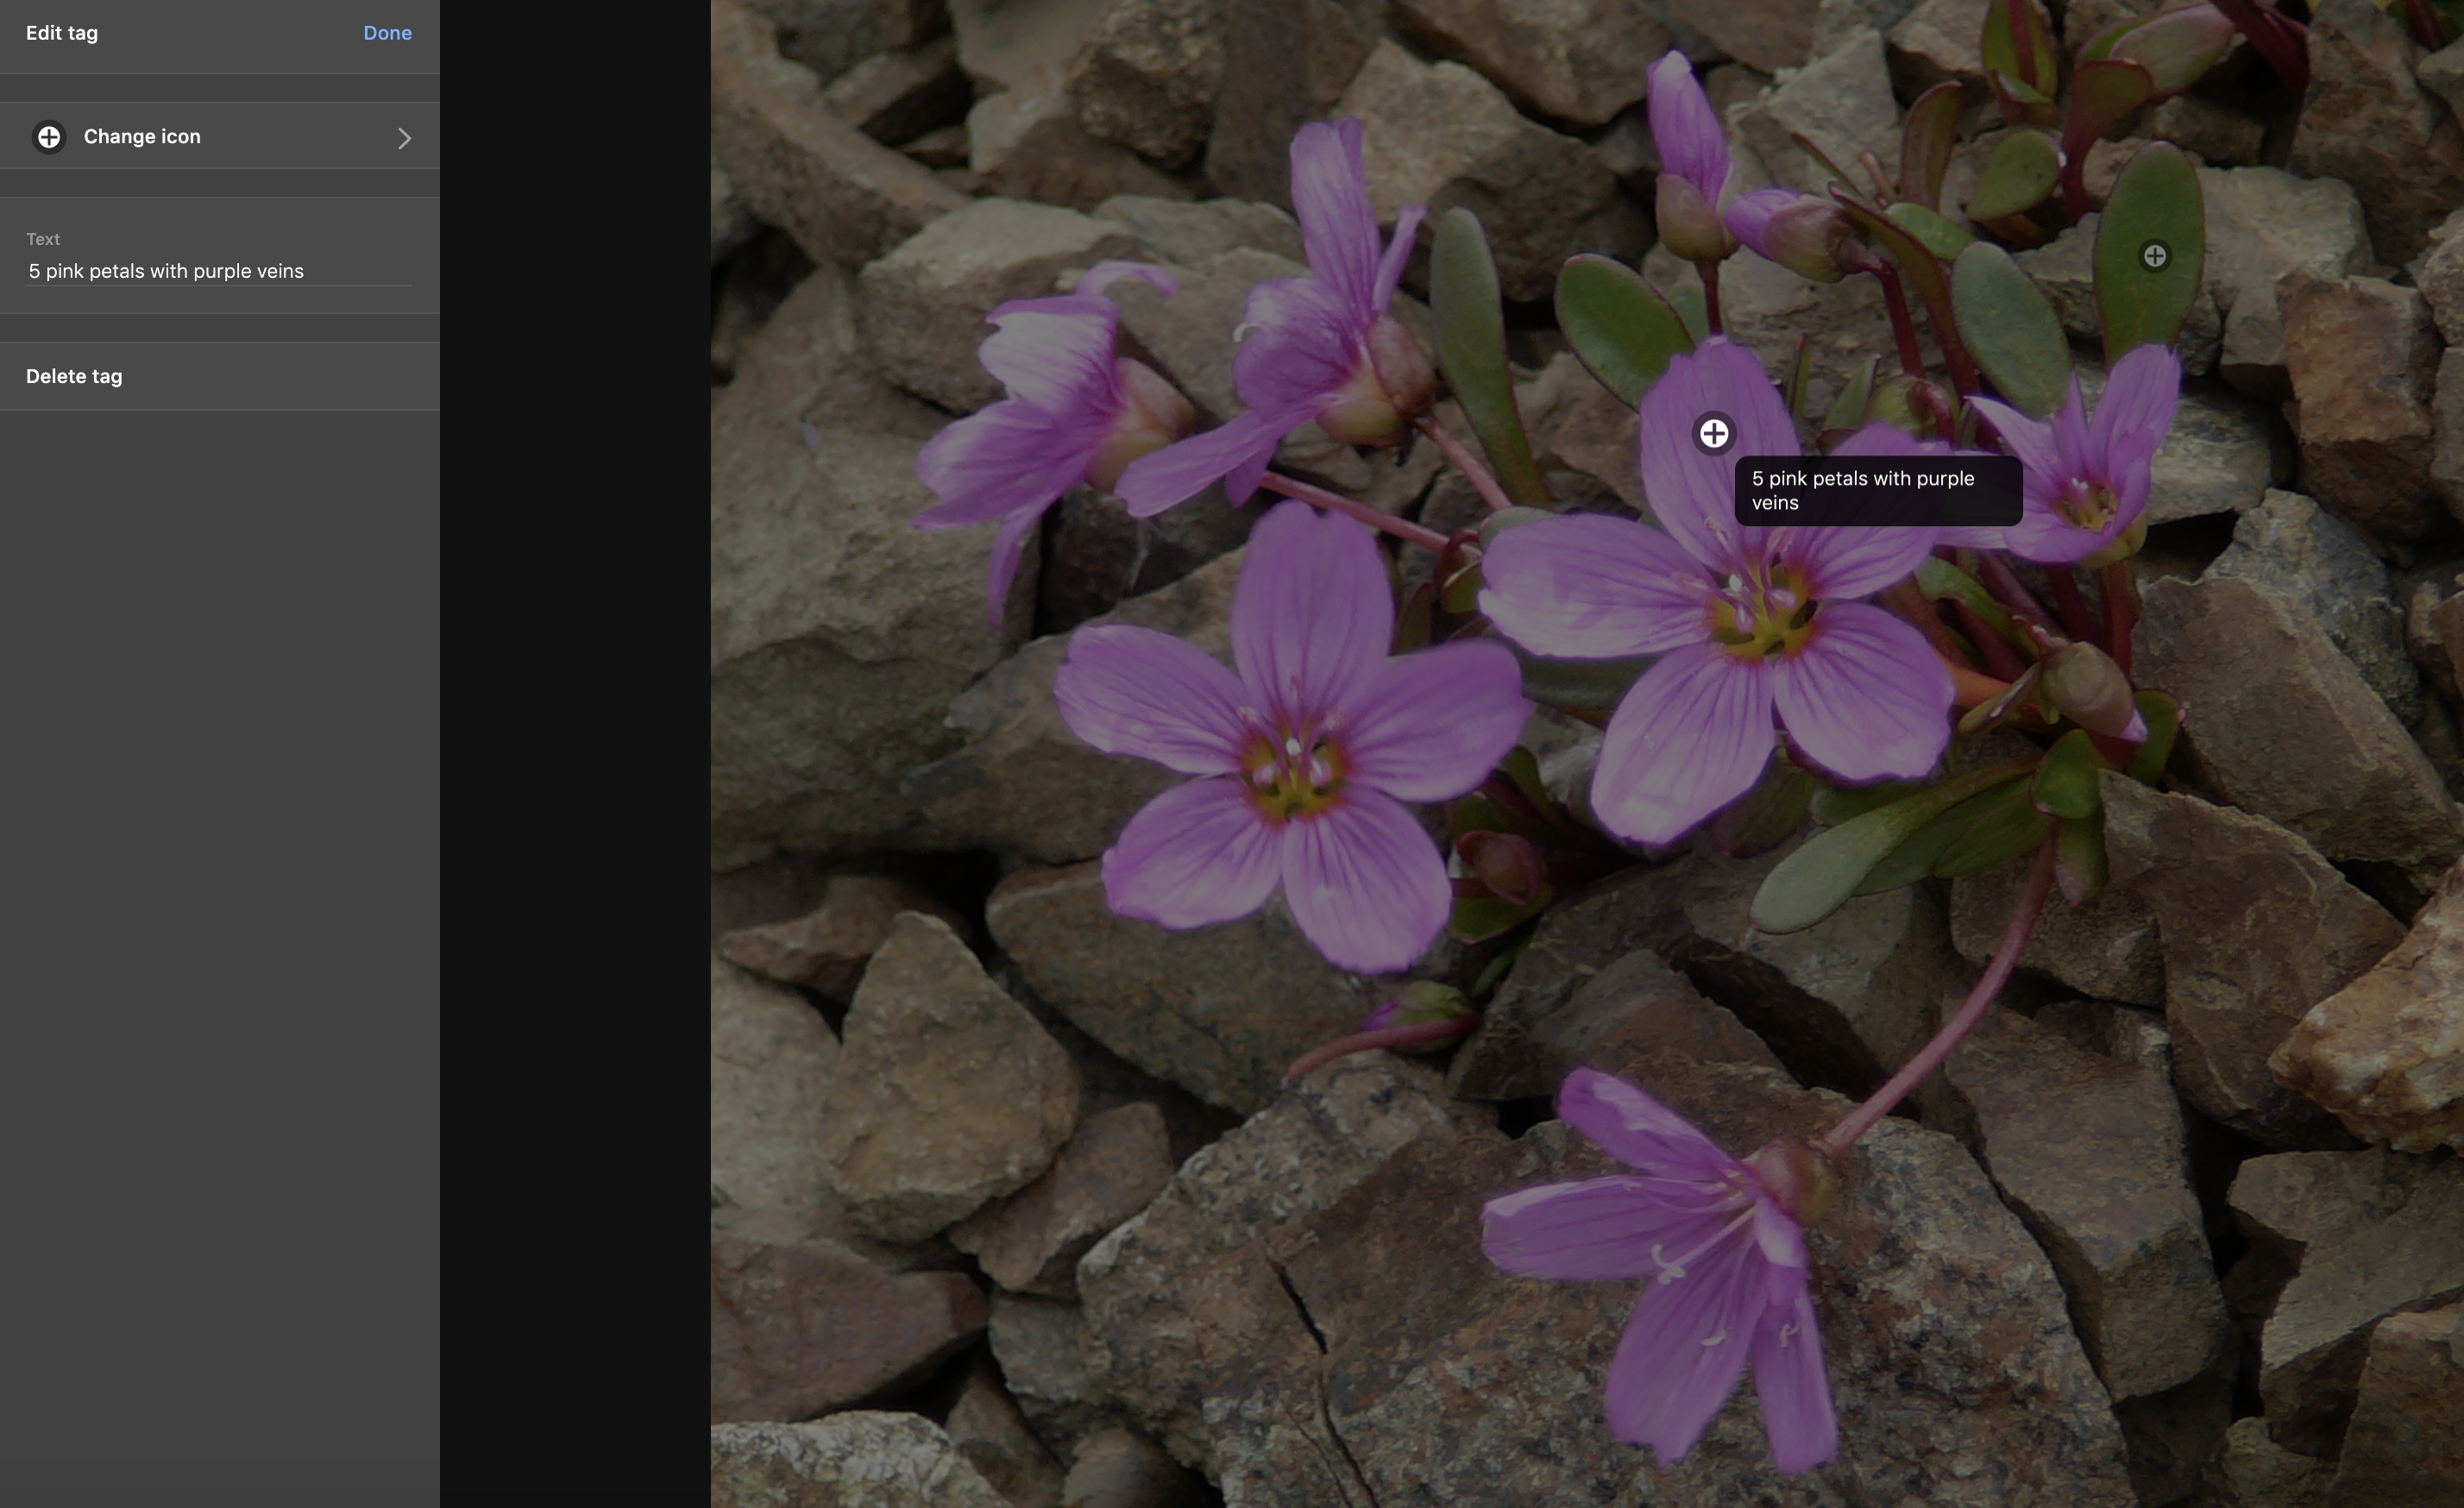
Once you uploaded an image it will appear in your dashboard and you can add a) descriptive tags to your images, but you can also upload b) an image so you can show what the flowers would look like when they are dissected or if you want to show the underside of a leaf you can do that all in one “image’ it is kind of a virtual tour of the plant you are dissecting, and your guiding the reader through the process of your work. See below of an example with a tag that has text and an image associated.
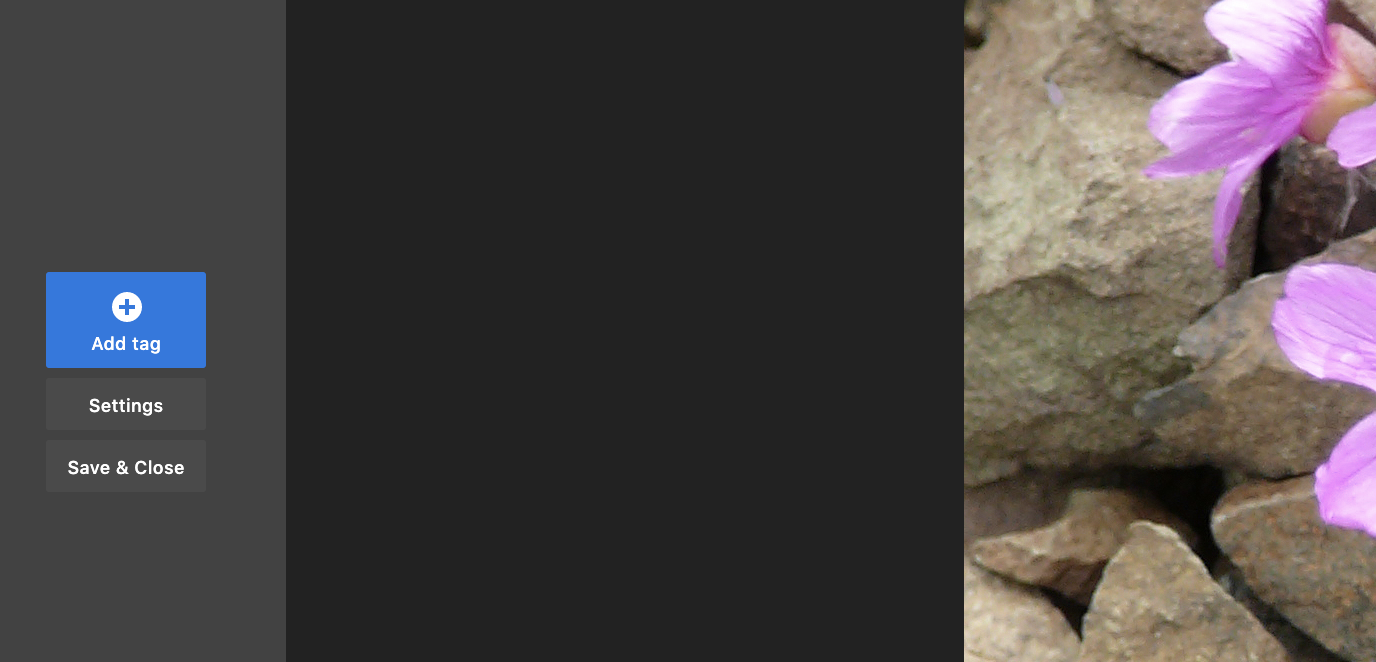
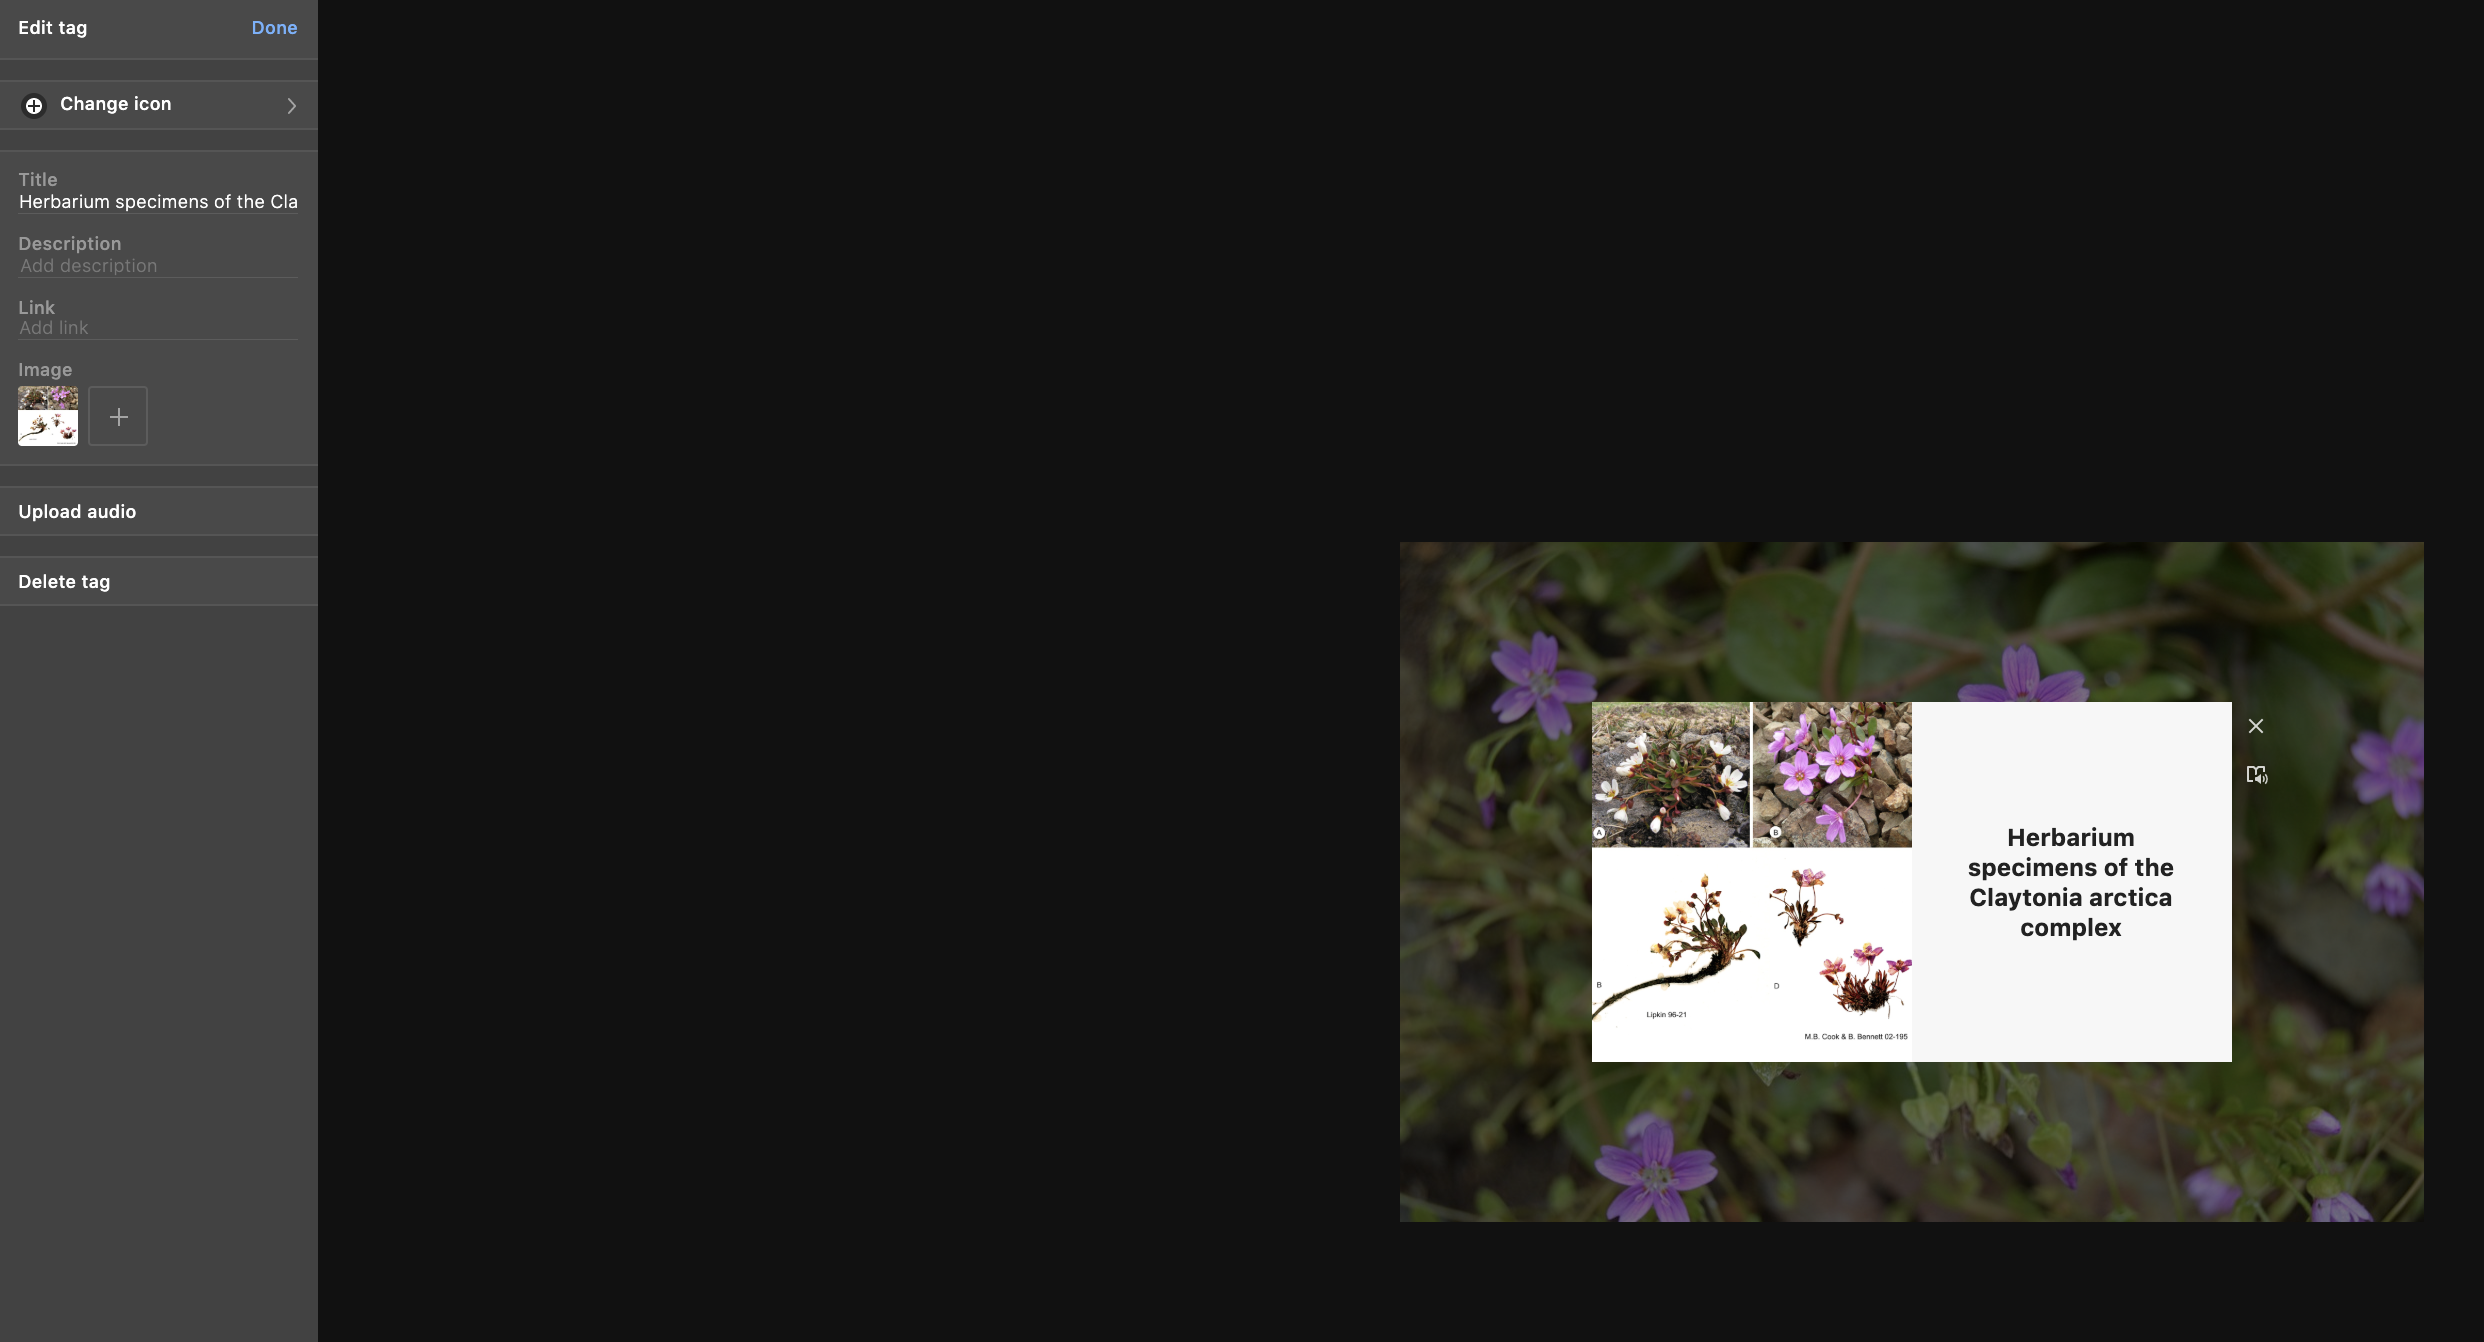
Click “Done’ if you are done editing your image. And “save and close’
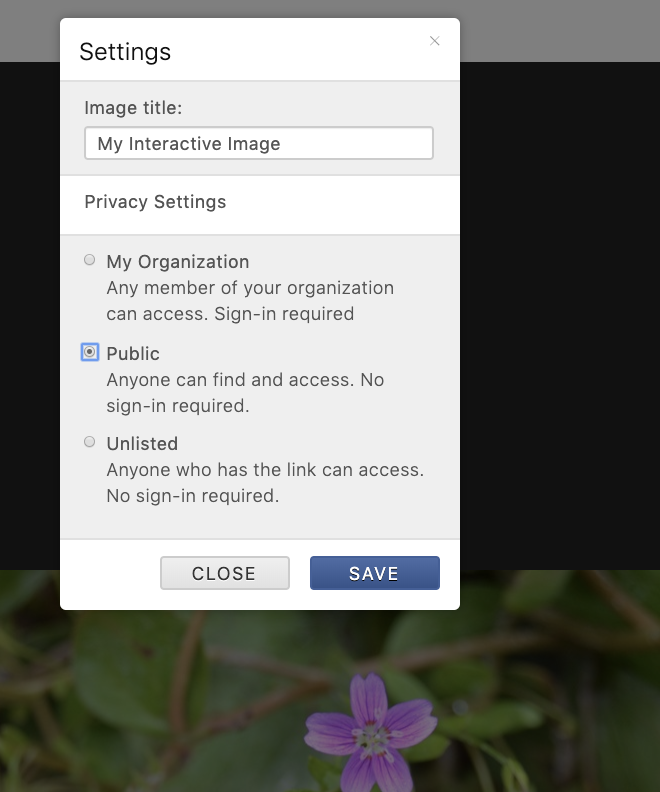
Now you can go to the “gear icon’ on the upper right hand corner, the settings window will open and here you will want to select “Public’ and “SAVE’.
Return to your dashboard and select the image URL (https://www.thinglink.com/scene/1206975994909425671 to embed in the post on the Webpage for the class
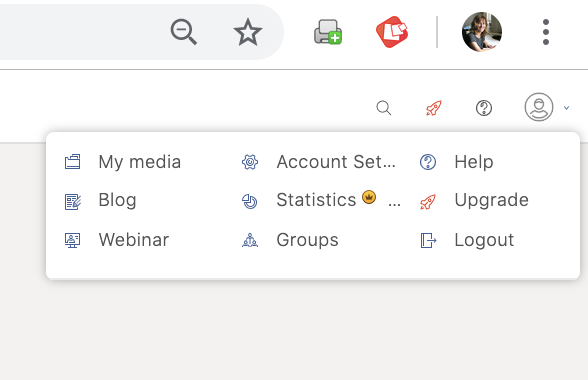
If you have the wrong account settings, you will need to delete the account and start over following the instructions above. Click on the account profile icon (the little person on the right hand side of your dashboard), select the gear icon = Account settings and select “delete account’ at the bottom